Showing posts with label routerboard. Show all posts

Mikrotik New Product RB2011L

Posted by Admin Thursday, June 28, 2012 0 comments
The mikrotik router RB2011 is a low cost multi port device series. Designed for indoor use, and available in many different cases, with a multitude of options. 

The RB2011L-IN is the most basic model, with five Gigabit ethernet ports, five Fast ethernet ports, power jack and PoE support. It comes in a metal indoor case. 

It’s powered by the new Atheros next generation 600MHz 74K MIPS network processor and has 64MB of RAM and a Level4 RouterOS license. Wall mount kit for network closet is available for purchase as an optional accessory.

That's it about mikrotik router RB2011.

Mikrotik RouterBoard RB800 Review

Posted by Admin Friday, June 8, 2012 0 comments
Mikrotik Router Board RB800 Review - If you do a little digging, you will find the RB800, which is set to release in a few weeks. This is a 800MHZ board which makes it the most powerful wireless board to date! It seems like on most tower installations, you are bridging at the radio and routing at the base of the tower.

It looks like Mikrotik is trying to beef up the radio so much that you no longer will need to route at the base, all will be handled by a single piece of gear. I’m going to reserve judgment for some real world tests, but it looks like a pretty nice board. It looks like they will be coming in around $340 over at BalticNetworks. Perhaps they will be kind enough to send me one for review (hint hint).


800Mhz
256MB RAM
4 minipci slots
3 gigE ports
2 daughter board connections
1 minipci-e slot
1 compact flash slot

Mikrotik RB1100AHx2, 1U Rackmount Gigabit Ethernet

Posted by Admin Thursday, May 24, 2012 0 comments
It has thirteen individual gigabit Ethernet ports, two 5-port switch groups, and includes Ethernet bypass capability. 2GB of SODIMM RAM are included, there is one microSD card slot, a beeper and a serial port. The RB1100AH comes preinstalled in a 1U aluminium rackmount case, assembled and ready to deploy.


CPU PowerPC P2020 dual core 1066MHz network CPU with IPsec accelerator Memory SODIMM DDR Slot, 2GB installed (RouterOS will use only up to 1.5GB) Boot loader RouterBOOT, 1Mbit Flash chip Data storage Onboard NAND memory chip, one microSD card slot Ethernet Thirteen 10/100/1000 Mbit/s Gigabit Ethernet with Auto-MDI/X Ethernet Includes switch to enable Ethernet bypass mode in two ports miniPCI none Serial port One DB9 RS232C asynchronous serial port.

Extras Reset switch, beeper, voltage and temperature sensors Power options Built-in power supply (IEC C14 standard connector 110/220V), PoE (12- 24V on port 13) Fan Built in fans, and Fan headers Dimensions 1U case: 44 x 176 x 442 mm, 1275g. Board only: 365g Operating System MikroTik RouterOS, Level 6 license.

Mikrotik New Product

Posted by Admin Friday, January 20, 2012 0 comments
The MikroTik new products: 

* RB751U-2HnD
* RB411L
* RB433GL
* R5SHPn
* RB433L
* RB751G-2HnD
* OmniTikUPA-5HnD
* RB433UAHL


Download the newsletter here: 
http://www.mikrotik.com/download/share/news_36.pdf

See you in the MUM in Poland! 

Bug spotting – PPPoE and Hotspot

Posted by Admin Sunday, January 15, 2012 0 comments
Came across an interesting (yet to be verified) bug today.
The info:
RouterOS v4.10 running on x86 server
Site runs both a hotspot and PPPoE server on the same interface.
Users can decide to login via the captive portal (which most do) or for those who understand and wish to use a pppoe connection, they have the option to use that instead, as it comes with a public IP.

The problem:
Support call came in saying that a user was unable to access www.google.com (which for the sake of this example we’ll say resolves to 192.0.2.1). I checked and confirmed I could indeed ping and trace to the address and put it down to a user issue, but left the ticket open to have one of our on-site techs give a try.
– later on–
Onsite tech indicated he to had become unable to access www.google.com via the pppoe login option and after getting a first hop response from the gateway the connection simply timed out.
The cause:
I’ll save you from having to hear about everything I tested and tried over the next hour however the actual cause was rather interesting.
The “hosts list” on the hotspot, had old entries from someone with an improperly configured IP address (in this case 192.0.2.1) which had tried to access the login page sometime in the past couple of days and was being held there. This meant that for users connected behind the pppoe interfaces, traffic to 192.0.2.1 was trying to go to that host RATHER than going out the correct default route.
Why? No idea.
The solution:
When the hotspot was setup (we’d reinstalled the machine just recently) it appears someone had forgotten to set the ‘idle-timeout’ value on the hotspot user-profile. This meant all these hosts were being held and the table was getting larger and larger (there were other incorrect addresses in there too).
Better solution: Provided by Mikrotik support
You have an option to allow only specific subnet to reach the HotSpot network.
Add the to ip-binding, specify subnets you would like to allow and set type=regular.
Block any other unneeded subnet by type=blocked.
Eg:
/ip hotspot ip-binding
add address=10.10.40.0/21 comment="Accept (not bypass) anything in the LAN range" disabled=no
add address=0.0.0.0/0 comment="block all else" disabled=no type=blocked

Side note: We don’t use the address-pool option on the hotspots as this causes LAN traffic to pass back (and be counted by) the router which we don’t want (as we let our users have unlimited LAN access to each other) so I’m at quite a loss as to why this routing pattern would occur.

RouterBOARD 711-2Hn

Posted by Admin Wednesday, October 19, 2011 0 comments
Mikrotik Router RouterBOARD 711-2Hn - The RB711 is a small CPE type RouterBOARD wireless router with an integrated 2GHz 802.11b/g/n wireless card. RB711 includes RouterOS operating system which can be a router, firewall, bandwidth manager, a CPE and more - all at the same time.

This device has one MMCX connector allowing single chain connectivity. The integrated wireless card is capable of up to 27dBm transmit power output and has built-in 16kV ESD protection on RF and LAN ports.

Features mikrotik router RB 711-2n :
Performance: Atheros AR7241 400MHz CPU
Memory: 32 MB DDR SDRAM onboard memory
Ethernet: One 10/100 Mbit/s Fast Ethernet port with Auto-MDI/X
Wireless: Built in 2GHz AR9280 802.11b/g/n card, 1x1 MIMO, 1x MMCX connector
Operating System: RouterOS v4 Included and Level 3 License
Power Options: Passive PoE
Dimensions: 10.5 cm x 10.5 cm (4.13 in x 4.13 in) Weight: 67g
( For the specific feature set of a MikroTik license level, please see the MikroTik web site ).

Mikrotik RB 1200 Review

Posted by Admin Tuesday, October 11, 2011 0 comments
Mikrotik router RB 1200 Review - The new and affordable rackmount router. It has ten individual gigabit Ethernet ports, five of them can be connected together in one 5-port switch group.

RB1200 has a SODIMM slot with bundled 512MB of RAM, a beeper and a serial port. It has no moving parts and it’s operation is completely silent, optional fan header is available. The RB1200 comes in a 1U aluminium rackmount case.

Specification Mikrotik router RB 1200 :

Product CodeRB1200
ArchitecturePPC
CPUPPC460GT 1000MHz
Current MonitorNo
Main Storage/NAND64MB
RAM512MB
SFP Ports0
LAN Ports10
GigabitYes
Switch Chip1
MiniPCI0
Integrated WirelessNo
MiniPCIe0
SIM Card SlotsNo
USBNo
Memory CardsNo
Power Jack110/220V
802.3af SupportNo
POE InputNo
POE OutputNo
Serial PortDB9/RS232
Voltage MonitorYes
Temperature SensorYes
Dimentions1U case: 44x176x442m
Operating SystemRouterOS
Temperature Range-20C .. +65C
RouterOS LicenseLevel6

All throughput tests done with Xena Networks specialized test system and RouterOS v5, according RFC2544, with Ethernet frame sizes 64, 512, 1518 bytes. Each board is tested with specified number of Ethernet interfaces, to ensure optimal load on hardware.

Mikrotik RouterBoard High Speed Capacity

Posted by Admin 0 comments
Previous product line MikroBits has issued a series MikroBits Celoica 8101 Core 2 Quad, and now latest series MikroBits Celoica 8101 Quad Xeon (available ROS Level 4, 5 and 6), MikroBits Celoica rackmount solutions for the needs of large-capacity router, with an Intel ® Xeon ® Processor X3380 (12M Cache, 3.16 GHz, 1333 MHz FSB), 2 GB of RAM, and 10 gigabit ethernet ports. Fastest among other products.

Specification :

  • Processor : Intel® Xeon® Processor X3380 (12M Cache, 3.16 GHz, 1333 MHz FSB)
  • RAM : 2 x 667MHz DDR2 Slots, 2 x 1024MB Industrial Grade RAM (2GB RAM) installed on the base Model
  • Boot loader : Award 16 Mbit PnP Flash BIOS with function of BIOS redirected to COM port
  • HDD Interface : 2x SATA, IDE, 1x CF Slots with True IDE IBM MicroDrive Support
  • Compact Flash : 1 GB Industrial Grade Compact Flash for RouterOS
  • HDD : 250GB SATA 2.5" HDD
  • Ethernet : 10 x 10/100/1000Mbps Gigabit Ethernet (Intel® 82574L)
  • Lan by-pass : 2 groups, LAN1-LAN2, LAN3-LAN4Expansion Slots : 1 x 32bit/33MHz MiniPCI/1 x PCIe x8 slot
  • Serial port : 1 console, RJ type
  • LCDs : 1x back lit 2character x16 character LCD Display
  • LEDs : Power and HDD LED
  • Speaker : Mini PC - Speaker
  • Power : IEC C13 Power Cord, input power: 100VAC-250VAC 50Hz- 60Hz (International PSU)
  • Fan : 3x Redundant CPU/Power Supply /Chassis Fans,
  • Dimensions : 44 mm (1.73") (H) x 427.8 mm (16.93") (W) x 392 mm (15.43") (D)
  • Operating Temperature : 0°C ~ +45°C (32°F ~ 113°F)
  • Storage Temperature : -20°C ~ +70°C (-4°F ~ +158°F)
  • Humidity : 10% ~ 95% RH, non-condensing
  • Power Supply : 270W ATX PSU
  • Operating System : MikroTik Router OS v5
(rbmikrotik).

Mikrotik RouterBoard RB435g

Posted by Admin Saturday, October 8, 2011 0 comments
Five miniPCI slots and three Gigabit Ethernet ports give you enough connectivity options to use the RB435G as the central part of your network. Now with Gigabit ports, to properly utilize all the speed 802.11n with Nv2 wireless. Five miniPCI slots to be used for four sectors and a backbone, or any other configuration you need. The two USB 2.0 ports can be used for extending storage, adding a 3G wireless modem for backup connectivity,for a mobile installation or all together. The RB435G comes with a 680MHz Atheros CPU and is preinstalled with a Level5 RouterOS license.

CPU: Atheros AR7161 680MHz (800MHz option supported)
Memory: 256MB DDR SDRAM onboard memory
Boot loader: RouterBOOT
Data storage: 128MB onboard NAND memory chip and microSD slot for expansion
Ethernet: Three 10/100/1000 Gigabit Ethernet ports with Auto-MDI/X
miniPCI: Five miniPCI Type IIIA/IIIB slots
Expansion: Two USB 2.0 ports with powering (5V 1A supply)
Extras: Reset switch, beeper, temperature, voltage and current monitors
Serial port: One DB9 RS232C asynchronous serial port
LEDs: Power, NAND activity, 5 user LEDs
Power options: PoE: 8-28V DC on Ether1 (Non 802.3af). Jack: 8-30V DC
Dimensions: 105 mm x 154 mm, Weight: 153g
Power consumption: ~4.5W without extension cards
Output to cards: 19W without any cooling, up to 40W with active cooling
Operating System: MikroTik RouterOS, L5 license


(http://www.balticnetworks.com/mikrotik-routerboard-435g-rb-435g.html).

Mikrotik RouterBoard RB493AH

Posted by Admin Monday, October 3, 2011 0 comments
The RB493 has nine ethernet ports and three miniPCI slots, it also has a switch chip, so the ethernet ports 2-9 can be grouped together to make it act as a switch.

RB493 includes RouterOS - the operating system, which will turn this powerful system into a highly sophisticated router, firewall or bandwidth manager.

With nine Ethernet ports, and three miniPCI slots, this is our most versatile RouterBOARD model.

The RB493AH model includes the higher speed Atheros 680MHz CPU, more memory, and a Level5 license for more simultaneous tunnel interfaces and hotspot users.

Product specifications

Details
Product code RB493AH
CPU speed 680MHz
RAM 128MB
Architecture MIPS-BE
LAN ports 9
MiniPCI 3
Integrated Wireless 0
USB 0
Memory Cards 0
Power Jack 10-28V
802.3af support No
PoE 10-28V
Voltage Monitor No
Temperature range -30C to +60C
RouterOS License Level5

 (http://routerboard.com/RB493AH).

Configure Mikrotik CPE Router

Posted by Admin Thursday, July 14, 2011 0 comments

This is my first post about the Mikrotik Product.  I will be putting up several examples in the coming weeks and months, so if you don’t see what you are looking for, be sure to contact me directly.  Leaving a comment is fine, but not likely to be “answered” unless it is a clarification for the specific article.
This article is intended to be a short guide to help you configure a Mikrotik router to behave in a way that is similar to a soho router with a wireless connection upstream.  This configuration is perfect for a WISP that is using devices like the RouterBoard 411 (priced at about $59), along with a CM9 or similar radio (about $40), associated power supply, outdoor enclosure/antenna, etc.  The total cost of a flexible device like this is about $150-160, including everything needed to install at a customer’s house or business.

This particular configuration features a DHCP server for the LAN clients, wireless upstream and a NAT function that will allow you, the WISP, to only require a single IP for the customer.  For the impatient, you can scroll to the bottom for a CUT/PASTE complete script without further ado.  For those that WANT further ado, read on…
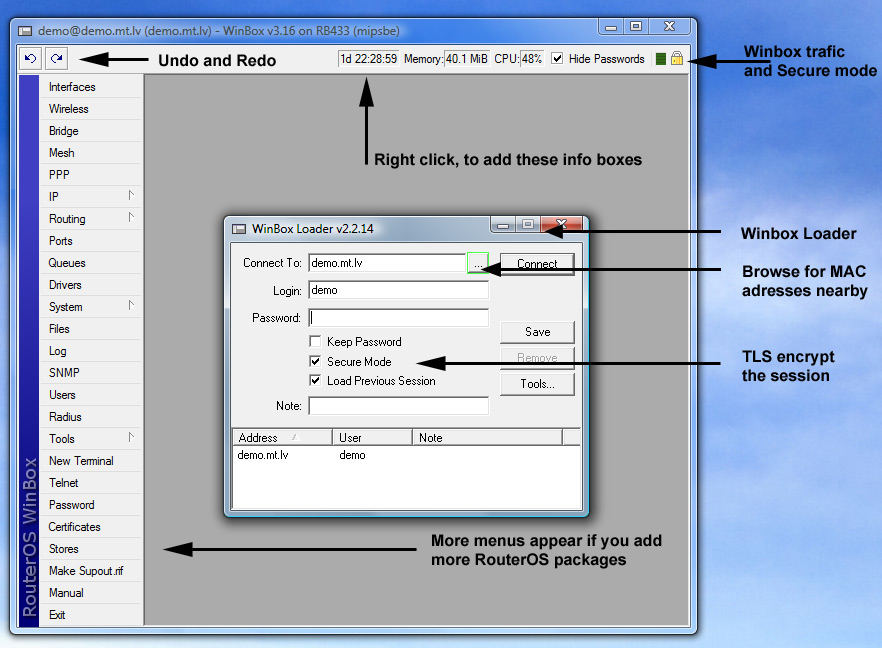
Step one with a newly opened RouterBoard product is to log into the board.  Other articles explain that process, so I won’t take time to do it here.
Now, on with the explanation:
# Get rid of any static routes
/ip route remove [find]


This removes any routes that may have been added by the vendor you purchased your router from.  There are a few that may set this up.
#turn on all interfaces and delay for 3 seconds
/interface enable [find]
:delay 3

This bit of code will enable all interfaces on the router (including the wlan card, which is not “on” by default).  The “:delay 3″ line causes a pause in the processing of the script.  This allows time for the system to load the drivers for the wlan card.
# Set SSID and band
/ interface wireless
set wlan1 mode=station ssid="SET_ME" band=2.4ghz-b/g disabled=no

This is where you will configure the parameters for the operation of the wlan card.  In this example, we set the card to operate as a 2.4GHz client in either “b” or “g” mode.  Your network may be different, so set this accordingly.  You can determine the supported bands with the following command:
/interface wireless info print
The CM9 card, for example, supports the following bands:
2ghz-b, 5ghz, 2ghz-g, 5ghz-10mhz, 5ghz-5mhz, 2ghz-10mhz, 2ghz-5mhz
#Next, we set the identity:
#Set customer name here -- no spaces or crazy characters please
/system identity
set name="client_NAME"

This is the name that will show up in the top of Winbox and as part of the prompt in terminal mode.  You will, also, see this name in the “neighbor list” of other local routers (“/ip neighbor print”).  Setting this makes it pretty easy to see which device is which when connecting to multiple routers.
# Set the wireless card to get an IP via DHCP
/ ip dhcp-client
add interface=wlan1 add-default-route=yes use-peer-dns=yes \
use-peer-ntp=yes comment="This interface talks to the tower" disabled=no

If you provide your customers with an IP address via DHCP server at the AP, then this is the code you will use to set up the client side.  If you assign your customer a static IP address, then you can add that IP below and leave this portion of the configuration out.
# This should be the IP inside the network...
# Doesn't need to be changed unless the network demands it (private network)
/ ip address
add address=192.168.7.1/24 interface=ether1 \
comment="This is the customer's gateway" disabled=no

We are assigning the CUSTOMER LAN address here.  If they are using a different range of addresses (static assignments), then you may need to alter this address and the DHCP server below.  Also, you can add the “outside interface” (wlan card) IP address assignment here if that is the way your network functions.  You just have to duplicate the last 2 lines and set the “interface” to “wlan1″ and set the address appropriately.  Also, you will have to add the default route as follows:
/ip route add gateway=10.10.10.1
Just be sure that you set the gateway appropriately for your network.
# Configuration for the DHCP server for the LAN
/ ip pool
add name="dhcp_pool1" ranges=192.168.7.100-192.168.7.200
/ ip dhcp-server
add name="dhcp1" interface=ether1 lease-time=1d address-pool=dhcp_pool1 \
bootp-support=static authoritative=yes disabled=no
/ ip dhcp-server network
add address=192.168.7.0/24 gateway=192.168.7.1 dns-server=4.2.2.3


This code does several things, but as a whole, it sets up a DHCP server on the LAN side of the network.  If you changed the LAN IP above, you will need to make adjustments in this section of the configuration.  Note that the “dns-server” setting here is the server that is sent to the LAN clients.
# You can change the DNS to be what you want
/ ip dns
set primary-dns=4.2.2.2 secondary-dns=4.2.2.3 \
allow-remote-requests=yes cache-size=2048KiB cache-max-ttl=1w

Strictly speaking, the DNS servers here are not necessary, but are advised.  Just ensure that you use working DNS servers here.  One reason you may want to set these is if you want to create a caching dns server for the LAN clients.  If you want to do this, you can set the “dns-server” parameter above to point to the 192.168.7.1 (ether1 IP) address.  Note the option above that says “allow-remote-requests=yes“.  That is not a default setting (it’s off by default), so be sure that you turn it on if you want the caching dns server to work.
/ ip firewall nat
add chain=srcnat out-interface=wlan1 src-address=192.168.7.0/24 \
action=masquerade disabled=no

This section only has to be changed if you made changes to the LAN IP address above.  This is the code that sets up the router to masquerade (NAT) traffic out the wlan port.
That’s all there is to it! Below you will find the full script ready for you to hack to fit your network.  Just copy this code to the clipboard (highlight it, then hit CTRL-C), then paste it into notepad (or other favorite text editor), make appropriate changes and save it somewhere that is convenient for you.  To use it on a router, you simply connect to the NEW router, open a “New Terminal”, RIGHT-CLICK in the window and select paste.  That’s all there is to it!  Here’s the script in it’s entirety:
# Get rid of any static routes
/ip route remove [find]

#turn on all interfaces and delay for 3 seconds
/interface enable [find]
:delay 3

# Set SSID and band
/ interface wireless
set wlan1 mode=station ssid="SET_ME" band=2.4ghz-b/g disabled=no

#Set customer name here -- no spaces or crazy characters please
/system identity
set name="client_NAME"

# Set the wireless card to get an IP via DHCP
/ ip dhcp-client
add interface=wlan1 add-default-route=yes use-peer-dns=yes \
use-peer-ntp=yes comment="This interface talks to the tower" disabled=no

# This should be the IP inside the network...
# Doesn't need to be changed unless the network demands it (private network)
/ ip address
add address=192.168.7.1/24 interface=ether1 \
comment="This is the customer's gateway" disabled=no

# Configuration for the DHCP server for the LAN
/ ip pool
add name="dhcp_pool1" ranges=192.168.7.100-192.168.7.200
/ ip dhcp-server
add name="dhcp1" interface=ether1 lease-time=1d address-pool=dhcp_pool1 \
bootp-support=static authoritative=yes disabled=no
/ ip dhcp-server network
add address=192.168.7.0/24 gateway=192.168.7.1 dns-server=4.2.2.3

# You can change the DNS to be what you want
/ ip dns
set primary-dns=68.109.202.25 secondary-dns=10.21.11.1 \
allow-remote-requests=yes cache-size=2048KiB cache-max-ttl=1w

/ ip firewall nat
add chain=srcnat out-interface=wlan1 src-address=192.168.7.0/24 \
action=masquerade disabled=no


Source : http://blog.butchevans.com/2008/06/how-to-configure-a-mikrotik-router-to-replace-cpe-router/

Reset Mikrotik Password On RouterBoard

Posted by Admin Saturday, May 21, 2011 0 comments

To reset username and password mikrotik that installed on routerboard, wo only can do that with reinstalling mikrotik router os. You can use Net Install method to reset username and password on your mikrotik router board

Try this link to try reinstalling your routerboard.

Installing Mikrotik | Upgrade Router OS

Posted by Admin Sunday, May 8, 2011 0 comments

Using Winbox


  • Connect to your router with Winbox, Select the downloaded file with your mouse, and drag it to the Files menu. If there are some files already present, make sure to put the package in the root menu, not inside the hotspot folder!:

RB250GS Vlan Trunk Configuration

Posted by Admin Friday, March 11, 2011 0 comments
RB250GS Vlan Trunk Configuration - Below The Mikrotik RoutesOS Configuration, using one interface for trunk port to RB250GS

Prevent Self Interference With 3 Mini PCI in One Board

Posted by Admin 0 comments
To Prevent Self Interference With 3 Mini PCI in One Board, there is Adaptive Noise Immunity (ANI). There are 2 choises of ANI, ap-and-client-mode dan client-mode.

Use ap-and-client-mode if the RB mode is ap-bridge
Use client-mode if the RB mode is (mikrotik only)

To Activate ANI tool is:

Installing Mikrotik OS on WRAP

Posted by Admin Saturday, January 8, 2011 0 comments
Prerequisites:

Make sure that the WRAP board has the latest BIOS.

Notes: The WRAP board and Router OS take different com port settings in HyperTerminal. If you want to see the actual boot text from the WRAP board, not router OS, you have to change your setting to:

Configure your terminal emulator for 38400 8N1 (default baud rate), no handshake. To enter
setup, type S during the memory test. You should see somethink like the following:
PC Engines WRAP platform

tinyBIOS V1.4a (C)1997-2003 PC Engines
640 KB Base Memory
64512 KB Extended Memory
01F0 Master 848A HYPERSTONE FLASH DISK
Phys C/H/S 497/4/32 Log C/H/S 31/32/63
WRAP setup
(9) 9600 baud *3* 38400 baud
(C) CHS mode *L* LBA mode
(X) Xmodem upload (Q) Quit

What you can expect to see from time to time is something that looks like misc characters on HyperTerminal. When you have it set to the RouterOS settings, the misc garbage is the WRAP board information. When you have HyperTerminal configure for the WRAP board com port settings, the misc garbage is the RouterOS software.

The default setting for the RouterOS software is: 9600 8-N-1, with no flow control.

Step One:
Take the CompactFlash card and put it in a card reader. If your computer doesn't have one, an external USB reader, such as the "SanDisk ImageMate 12 in 1" has worked well:
Step Two:

Open up the Mikrotik "netinstall" program. Point the program to the location of the RouterOS packages. For the x86 platform (e.g. a WRAP board), check the "routeros-x86" package, and then hit install. The installer program will format the hard drive and install the package onto the CompactFlash card.
Note: Be absolutely positive that you are installing to the correct removable media.
Step Three:
Use a null modem cable, or a serial cable with a null modem adapter on it, and connect it to the WRAP board. Place the Compact Flash card, with the installed RouterOS software on it, and place it in the WRAP board. Open up HyperTerminal and set it for 9600 8-N-1. Power up the WRAP board, and make your connection with HyperTerminal. You should see the following information:

This screen actually takes quite a bit to do anything, so be patient. After a while you will see the following:


Once it gets to this point, it will reboot. Again, the time for this process can vary, so give it some time. It may actually hang at this point, though. If it does, pull the power and let it recycle. Even with a reboot, though, it may actually take a little longer to boot then you think it would. After it boots, you will see the following:


At this point, you can either work from the command line, or swap to Winbox. If you choose Winbox, just use the appropriate Ethernet cable and plug into your computer, or plug your RouterOS box into the same switch your computer is using. You don't even have to know the IP address, since Winbox will pull up the AP by MAC address:


Just click on the MAC address of the unit and hit connect, and it will connect.
(q4)

Manual:First time startup

Posted by Admin Wednesday, July 7, 2010 0 comments
In this mikrotik tutorial we explain how to begin with mikrotik.
Applies to RouterOS: 2.9, v3, v4

After you have installed the RouterOS software, or turned on the Router for the first time, there are various ways how to connect to it:

Method 1. Console Cable

If your device is a RouterBOARD, it doesn't have a monitor connector. You will have to either find a console cable (or Null modem cable) or see Method 2.

Plug one end of the serial cable into the console port (also known as a serial port or DB9 RS232C asynchronous serial port) of the RouterBOARD and the other end in your PC (which hopefully runs Windows or Linux). You can also use a USB-Serial adapter. Run a terminal program (HyperTerminal, or Putty on Windows) with the following parameters for All RouterBOARD models except 230:

115200bit/s, 8 data bits, 1 stop bit, no parity, flow control=none by default.

or for RouterBOARD 230:
 9600bit/s, 8 data bits, 1 stop bit, no parity, hardware (RTS/CTS) flow control by default. 
and you should be connected to the Router and can start by logging in and issuing the setup command (see top of the page for details).

Method 2. Winbox and MAC telnet

You can download the Winbox application from here: WinBox. Make sure that your Windows computer is directly connected to the router with an Ethernet cable, or at least that they both are connected to the same switch. Run Winbox, then click the [...] button and see if Winbox finds your Router and it's MAC address. If yes, connect to it and the Winbox GUI interface will be shown. You will be able to set up some initial parameter
s, but it is wise to allocate an IP address to the interface you have connected to on the RouterBoard (or Mikrotik PC) as this technique of communicating to the device via the MAC address uses network broadcasts and is not 100% reliable. Due to the use of broadcasting it is not therefore wise to use this on a real production / live network!


Follow the manual about configuring the router

This method works with any device that runs RouterOS. Your PC needs to have MTU 1500

Method 3. Monitor and Keyboard

Simply attach a monitor to the video card connector of the computer (note: RouterBOARD products don't have this, so use Method 1 or 2) and see what happens on the screen. You should see a login promt like this:

MikroTik v3.16
Login:

Enter admin as the login name, and hit enter twice (because there is no password yet), you will see this screen:
 
Now you can start configuring the router, by issuing the setup command.

This method works with any device that has a video card and keyboard connector